
Every account should be associated with an account type.
-
On the AMS menu, click Financial > Account Management > Account Types.
-
On the Account Types page, click Add. A row is added to the bottom of the page.
-
Enter the following information:
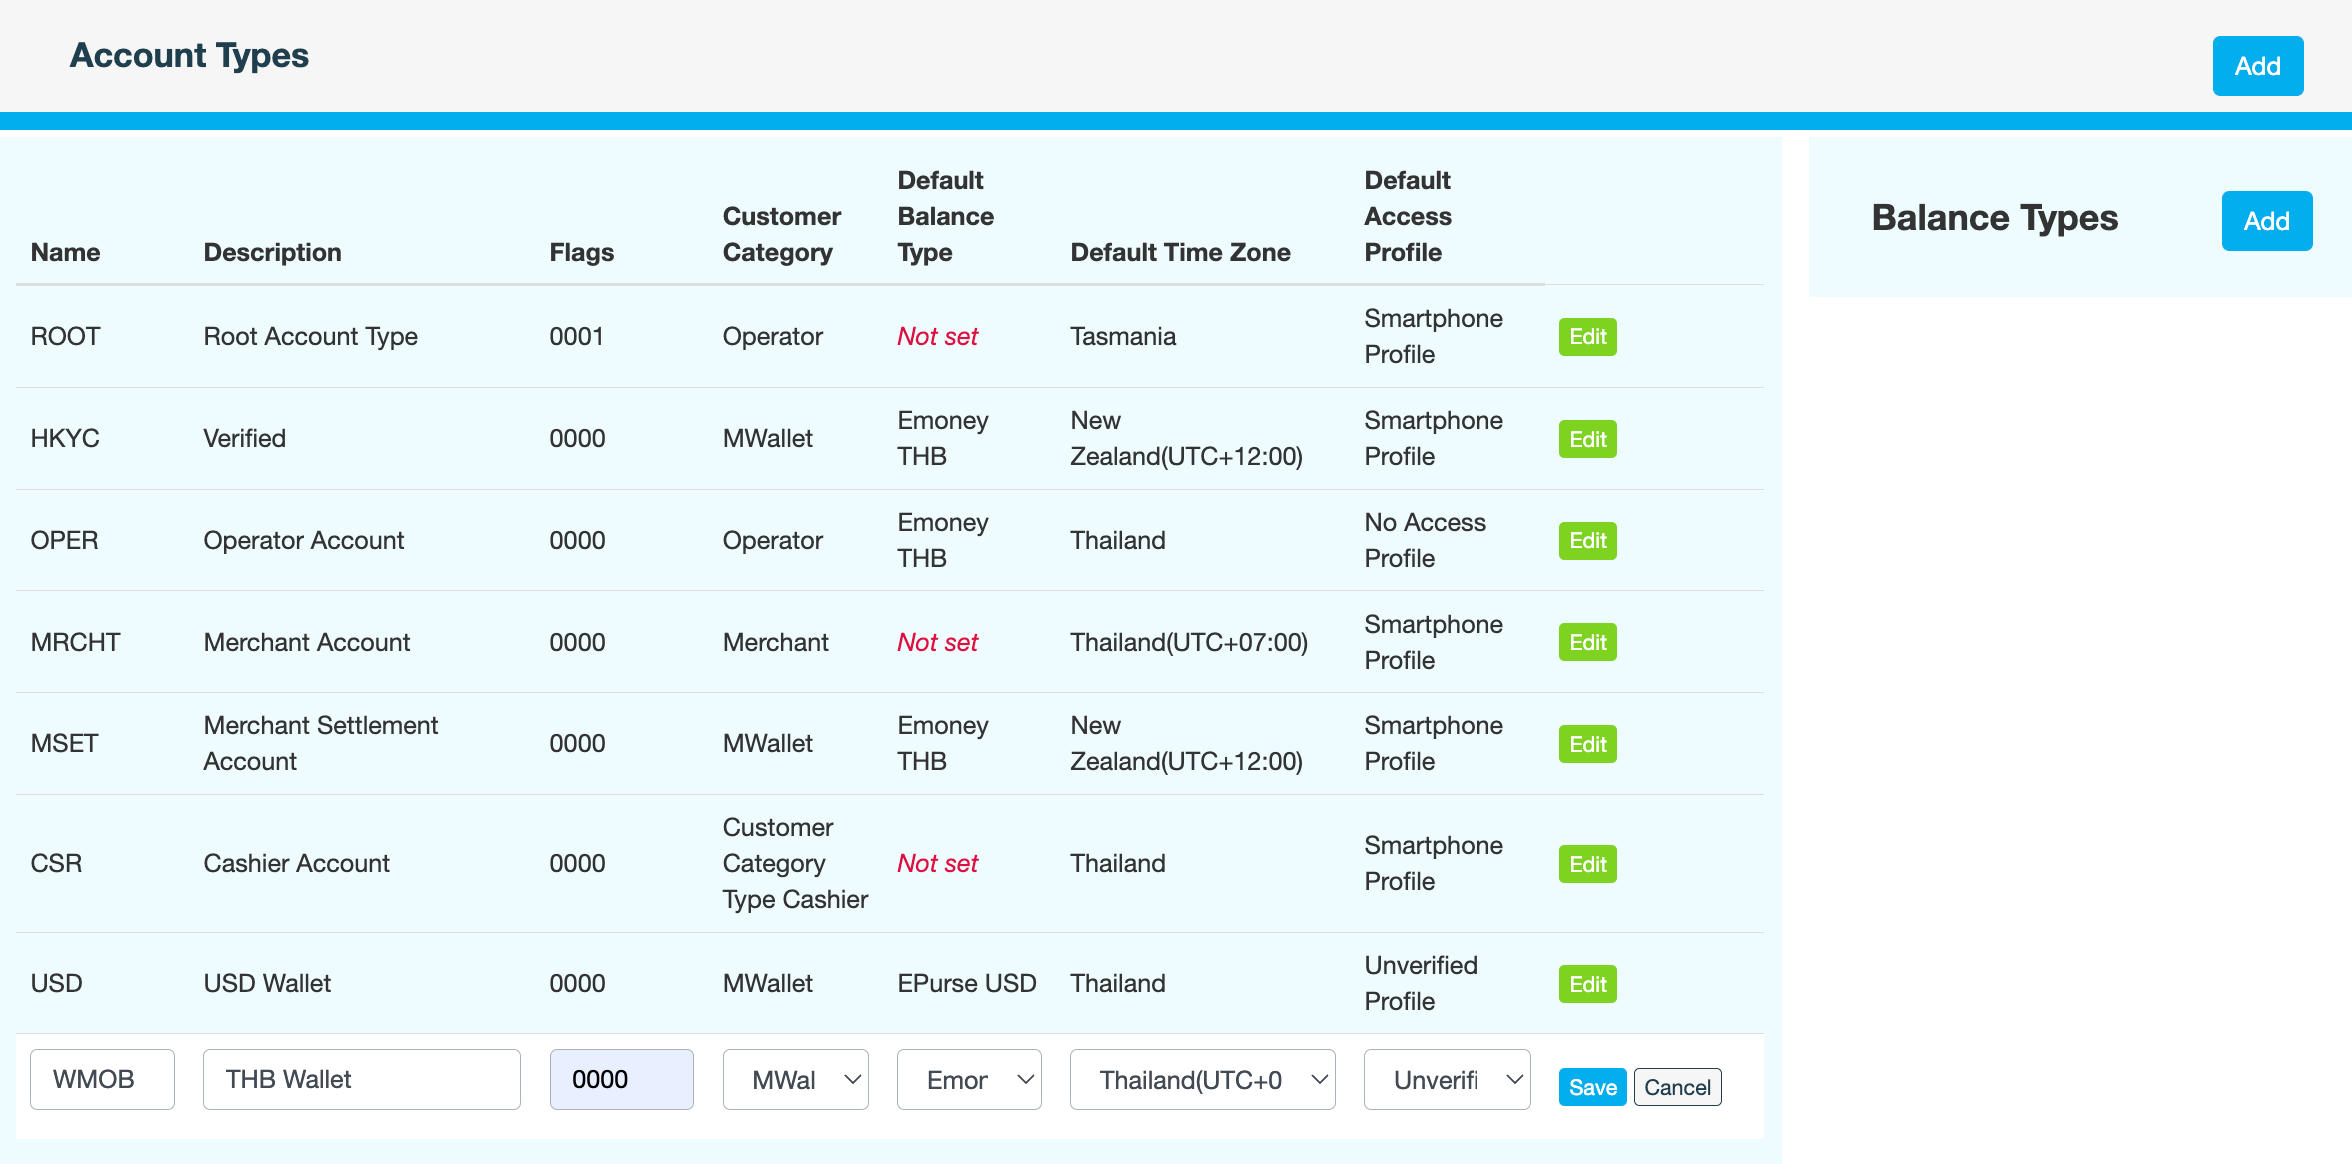
|
Field |
Description |
|---|---|
|
Name |
Short code for the account type If you edit the Name later, don't forget to also update the default.type namespace for this account type in Admin > Configuration > Wallet Configuration to match. |
|
Description |
Purpose of the account type |
|
Flags |
Hexadecimal value that defines the permissions and functionality for this account type. Enter 0000. |
|
Customer Category |
Customer group this account type applies to. For example, Cashier, Merchant, Operator. Customer categories determine certain behaviours, such as which customers appear in the mobile apps when viewing nearby businesses. |
|
Default Balance Type |
Balance type that this account type will use by default. For example, Emoney THB or EPurse USD. |
|
Default Time Zone |
Time zone to use when adjusting transaction dates
|
|
Default Access Profile |
Default access profile assigned to customers with this account type |
-
Click Save.
-
Enter a reason for creating the account type, then click CONFIRM.
What's next